
Before you choose a floor plan or spend money reworking drawings, do a quick site analysis. In about 30–60 minutes on the lot, you can spot how sun, slope, views, and wind will shape your layout, comfort, and budget. This checklist helps you capture the right photos and notes so your custom home architectural design starts with real site constraints, not assumptions.
A site analysis is simply a clear record of what your lot is doing and what the neighbourhood around it is likely to influence. You are not trying to “engineer” anything yourself. You are trying to collect enough evidence that your architect and builder can design to the site, instead of designing first and discovering problems later.
By the end of this checklist, you should have:
- A 4-direction photo set (with directions labelled)
- A quick sketch showing where sun hits, how the ground falls, and where wind funnels
- A short list of “must-protect” views and privacy concerns
- A few clear red flags that tell you when to bring in a survey, geotechnical, or municipal guidance
When To Do A Site Analysis And How It Saves Money Later
A lot in Greater Vancouver can look simple until you start thinking about winter sun angles, drainage after a heavy rain, or wind exposure on a ridge. Site analysis is your early filter. It reduces redesign, helps you choose smarter room placement, and prevents scope creep when the build is already underway.
You do not need to wait until you have finalized a design to do this. In fact, it is most valuable before decisions harden. The earlier you understand your lot, the easier it is to make trade-offs that still feel like a win.
Do It At 3 Decision Points
The same checklist is useful at three moments. Each time, you are just adding more detail.
- Before you buy: Confirm the lot supports what you want, especially if views, daylight, or a walk-out level matter to you.
- Before schematic design: Use your site notes to guide massing, entry location, and where you place your main living spaces.
- Before permit drawings: Recheck anything that could change the build approach, like drainage paths, mature trees, or access points for excavation.
In practice, this approach keeps you from paying for drawings that do not match the lot. It also reduces delays caused by late discoveries, like a driveway grade that is uncomfortable in winter, or a patio that sits in the windiest corner of the property.
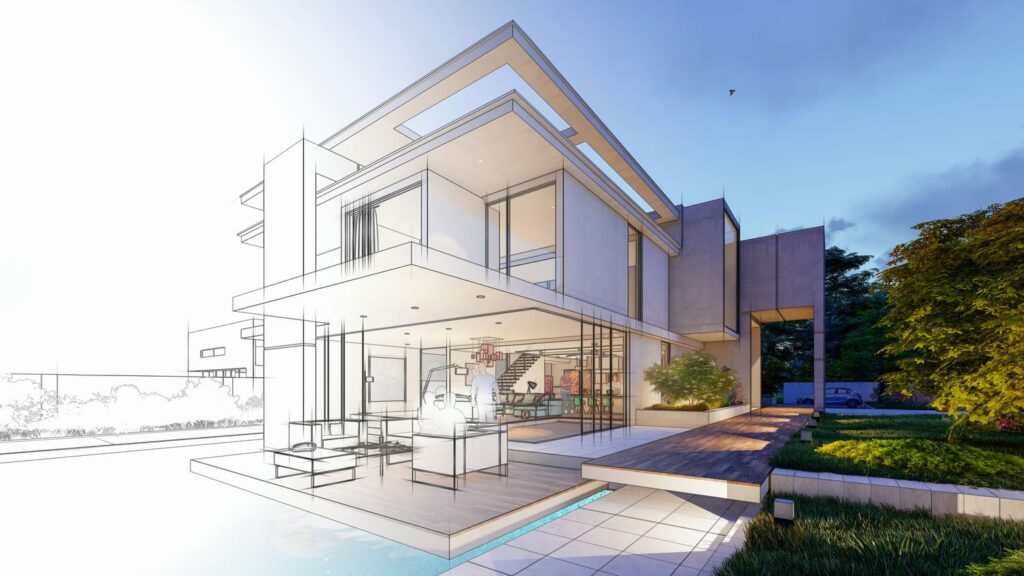
Where It Fits In The Architectural Design Phases
Site analysis is the foundation under your early design decisions. It helps you move faster through concept and schematic work because the “big moves” (entry, main rooms, glazing direction, outdoor living) align with what the site can actually support.
If you want a clearer picture of what comes next, it helps to understand how site inputs flow into concept, schematic design, and design development. Use this guide as a helpful breakdown of the typical architectural design sequence.
What To Gather First
A walk-around is powerful, but a few basic documents make your notes far more reliable. Think of this as “getting oriented.” You are confirming the lot shape, typical constraints, and anything that would change where you can build.
If you are still in the due diligence stage, you might not have everything. That is fine. Start with what you can get quickly, and make a list of unknowns to flag for your designer or builder.
Documents To Request Or Confirm
If any of these are available, they help you avoid guessing about the fundamentals.
- Legal plan or lot dimensions: Helps you understand frontage, depth, and approximate buildable area.
- Survey or topographic plan (if available): Useful for understanding grades, retaining walls, and any existing structures.
- Basic zoning and setback information: A high-level check that keeps your design realistic.
- Right-of-ways or covenants (if noted on title): Record that they exist and where they are, but leave interpretation to the professionals.
The goal is not to become an expert in bylaws. The goal is to avoid designing a home that depends on space you do not actually control.
Simple Tools That Help (No Special Software Required)
You can do a solid first-pass site analysis with a phone and a notebook. A compass app, camera, and notes app are enough to document most of what matters at this stage.
Bring something to mark directions on photos (even just “N/E/S/W” in your notes). If you are checking slope, a measuring tape can help with rough distances, but you do not need exact elevations. If you have a simple printable lot outline or screenshot, you can sketch on top of it.
Most importantly, keep your notes repeatable. If you visit again, you should be able to take the same photos and confirm whether your assumptions still hold.
Quick Site Analysis Checklist Summary
This table gives you a quick “what to check / what to record / when to bring help” view. Use it as your on-site guide, then expand your notes in the sections below.
If you only have time for one thing, do this: take a 4-direction photo set from the middle of the lot and label each photo with direction and time of day. That single step prevents a lot of confusion later.
| Topic | What To Check On Site | What To Record | When To Bring In A Pro |
| Sun | Where morning and afternoon light land, winter vs. summer exposure | 4-direction photos, best “bright zones,” glare spots | When glazing, overhangs, or neighbours’ shadows drive key decisions |
| Slope | How the ground falls, where water likely flows, access and driveway grade | Sketch of high/low points, drainage paths, photos of retaining walls | When steep grade, drainage issues, or excavation approach is unclear |
| Views | What you want to protect, what blocks it now, what could change | View photos from key points, room priorities | When height, massing, or privacy constraints affect the design |
| Wind | Where wind hits or funnels, exposed corners, sheltered outdoor zones | Notes on comfort zones, entry exposure, patio comfort | When outdoor living and entry comfort are priorities |
Sun Checklist: Daylight, Glare, Overheating

In Greater Vancouver, sun is not just about brightness. It’s also about comfort in shoulder seasons, glare in the evening, and how much natural light you get on shorter winter days. Your goal is to understand where the “good light” lands and where you may need to control it.
Sun analysis is also one of the easiest things to capture early. You do not need perfect data. You need consistent observations that translate into room placement and glazing decisions.
Quick Sun Test You Can Do In Under 10 Minutes
Start by identifying true south using a compass app. Then walk the lot and imagine your main living space in two or three possible positions. Ask a simple question: where would you want to sit most days, and what light would you get there?
If you can, visit at two times in the same day. Morning light and afternoon light behave differently, especially when nearby homes or trees cast long shadows. In winter, the sun sits lower, so shadows stretch further and can change your experience dramatically.
Your notes should be simple: “Best morning light here,” “Afternoon glare here,” “This area stays shaded most of the day.”
Shadow Sources To Look For
Shadows often come from things people overlook. Neighbouring homes, garages, and fences can cast more shadow than you expect, especially on tighter lots. Mature trees can change sunlight in summer, while losing leaves in winter and revealing different light patterns.
Topography matters too. If you are on or near a slope, a hill behind you can shorten daylight hours in certain seasons. If you are near the North Shore or in areas with bigger elevation changes, these effects can be noticeable.
Photograph the biggest shadow sources and write down what time you took the photo. That context helps your designer interpret what they are seeing.
What To Record Make It Repeatable
Your best “sun record” is a consistent photo set. Stand in one or two fixed spots (centre of the lot and where you think the main living area could go). Take photos facing north, east, south, and west.
Then add short notes that translate into design decisions: where you want a brighter kitchen, where a home office would benefit from softer light, and where you might prefer shade for summer comfort.
If you are comparing lots, use the same photo routine on every property. It makes trade-offs clearer and reduces the influence of “how it felt that day.”
Design Implications Tie To Glazing Decisions
Sun notes quickly turn into window and layout decisions. South-facing glazing can bring great daylight, but you may need shading details to prevent overheating in warmer months. West-facing glazing can create strong evening glare, which matters if your living room or kitchen faces that direction.
This is where it helps to think about glazing as a system, not just “bigger windows.” If you want a deeper explanation of how daylight and comfort relate to the amount of glass, our guide on window-to-wall ratio and daylighting breaks it down.
A good site analysis gives you enough confidence to say, “We want our main living space here because the light is better,” rather than trying to force daylight into a layout that fights the lot.
Slope Checklist: Grading, Drainage, Access, Foundation
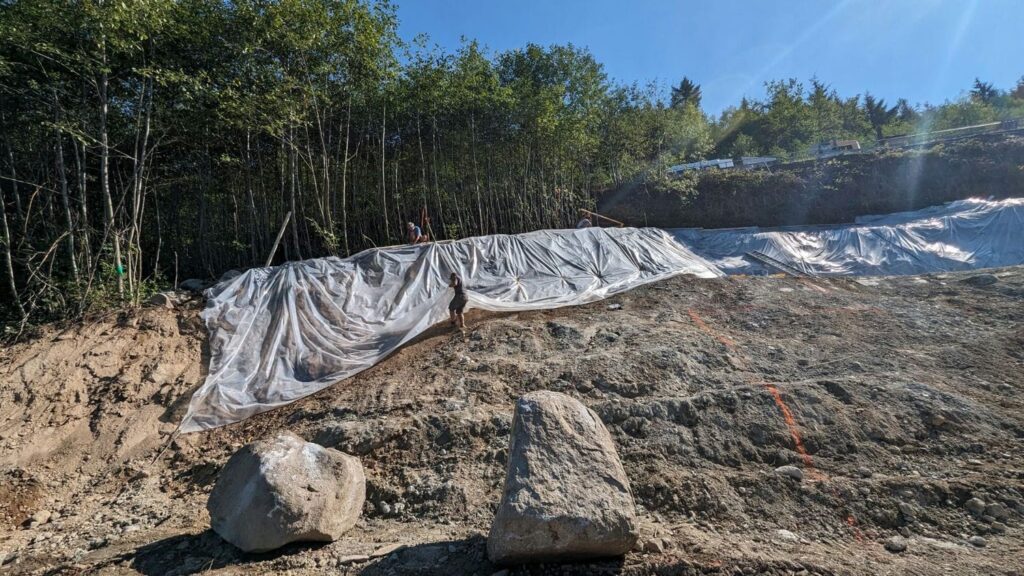
Slope is one of the biggest cost and complexity drivers on a custom home build. A lot that looks “slightly sloped” can still change excavation volumes, driveway comfort, drainage planning, and the structure needed to support the home.
Your goal here is not to calculate exact grades. It is to identify how the land falls, where water likely moves, and whether access and foundation choices will be straightforward or more technical.
What Slope Really Changes
Slope affects how you build the home and how you live in it. On a steeper site, you may end up with a stepped foundation, a walk-out lower level, or retaining walls that need careful planning. These choices can add cost, but they can also create better layouts if they fit your lifestyle.
Driveway grade is a practical issue many people underestimate. A steep driveway can be frustrating in winter conditions and may affect how you place the garage and entry. Even on flatter sites, drainage paths matter because heavy rain can expose low spots quickly.
If you capture slope observations early, you avoid “surprise scope” when excavation starts and the build approach changes.
What To Look For On A Walk-Around
Walk the lot and look for natural drainage clues. Low areas, soft ground, and places where water likely pools are important to record. If you can, visit after rain or soon after a wet period. In the Lower Mainland, that can tell you more in 10 minutes than a dry-day visit tells you in an hour.
Also look for signs of past movement or makeshift solutions. Leaning retaining walls, uneven patios, or patched drainage swales can hint at ongoing water or soil challenges. Take photos and note where they are on your sketch.
If the lot has existing structures, look at how the land meets the foundation. It can reveal where the ground has been cut or filled in the past.
Red Flags That Often Mean “Get Professional Input”
Some conditions should push you toward professional input sooner rather than later. Steep slopes, unstable edges, evidence of erosion, and significant retaining structures are all reasons to talk to your builder about survey and geotechnical needs.
Another red flag is when your design goals depend on major changes to grade, like deep excavation for a lower level on a steep lot. That can be buildable, but it changes sequencing, cost, and risk. It is better to confirm feasibility early than to redesign midstream.
A clear note like “possible steep grade at back, confirm with survey/topo” is often enough to keep the process moving without guessing.
Municipal Steep Slope Requirements Vary
If your property falls into a steep slope area or has environmental constraints, local requirements can influence what is permitted and what studies are needed. These rules vary by municipality, so treat your site analysis as a prompt to verify local guidance early.
As an example, the City of Abbotsford outlines information related to steep slope development permits here.
Your designer and builder can help you translate those constraints into a buildable plan, but your early notes help you ask the right questions at the right time.
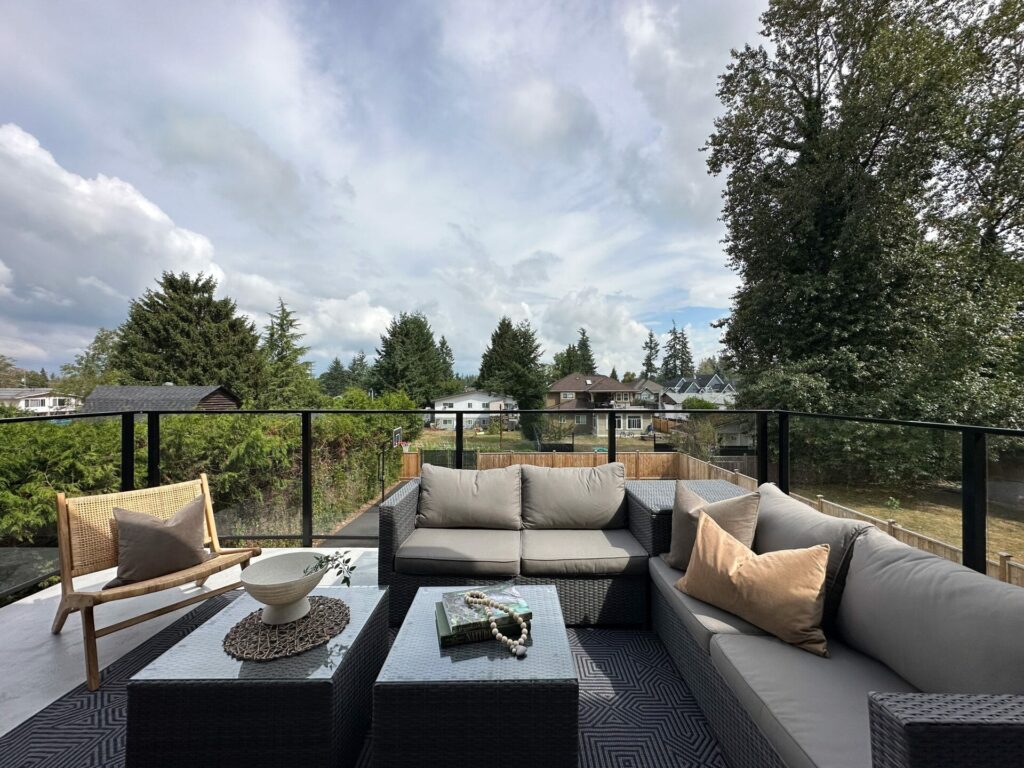
Views Checklist: Protect, Frame, And Avoid Future Surprises

Views often drive major design decisions, from where you place your main rooms to how you shape the roofline. The risk is that people talk about “the view” as if it’s one thing, when it’s usually multiple view moments that matter differently in daily life.
This section helps you define the view clearly, document it properly, and understand what could interfere with it over time.
Define The View In Plain Terms
Start by identifying what the view actually is. Is it a mountain ridge, water, skyline, treed privacy, or a long open sightline? Then rank it. A view you experience daily from the kitchen and living room often matters more than a view you only see from a hallway.
Next, decide how you want to experience it. Do you want big glass and a wide frame, or a more controlled view with privacy? These are design choices, not just “yes/no” preferences.
Take photos from a few heights, including the approximate height of your main floor and any upper-level spaces if your lot supports them.
Map View Blockers And Change Risk
Write down what currently blocks the view and what could change. Mature trees can be seasonal and can also be subject to municipal rules or neighbour decisions. Adjacent lots may redevelop over time, especially in areas seeing more infill and density changes.
You do not need to predict the future. You just need to be honest about what your view depends on. If your “best view” relies entirely on a neighbour’s hedge, call that out. It helps your designer frame the view moments that are most reliable.
If you are unsure, your builder can flag whether it’s worth investigating zoning and massing context around you.
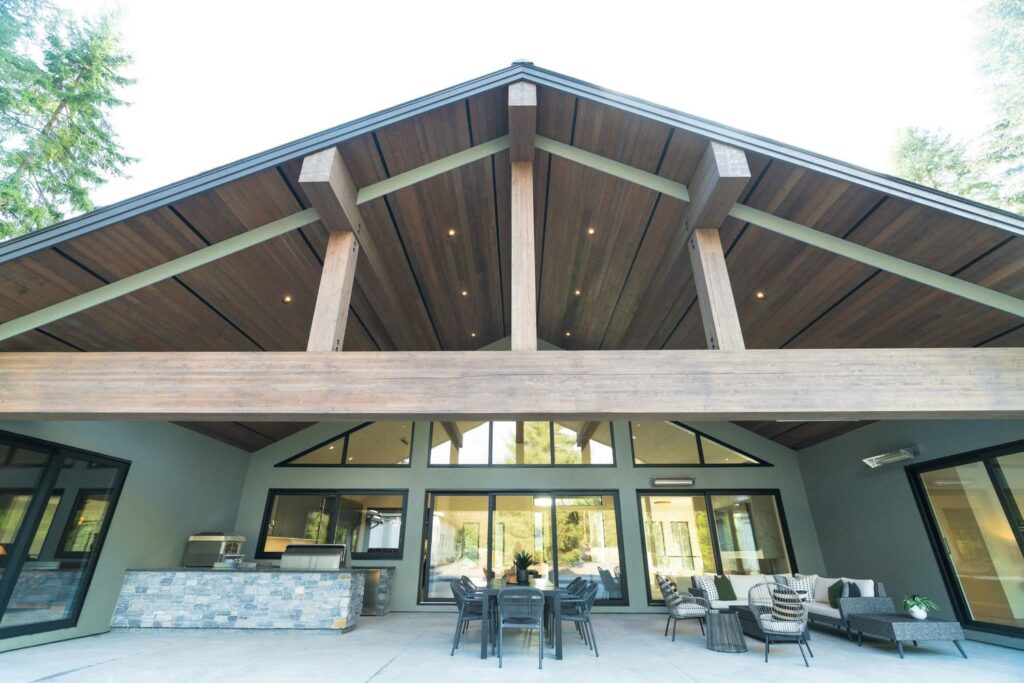
Design Implications
Views influence window placement, sill height, and how you shape interior sightlines. A well-framed view can feel more intentional than a giant pane of glass that also exposes you to neighbours or street sightlines.
Outdoor living is part of this too. Sometimes the best view belongs to a covered deck or a sheltered patio rather than the living room. Your site analysis helps you decide where those moments should live and how you connect them.
The more specific your view documentation is, the easier it is to protect the “why” of the design as the project evolves.
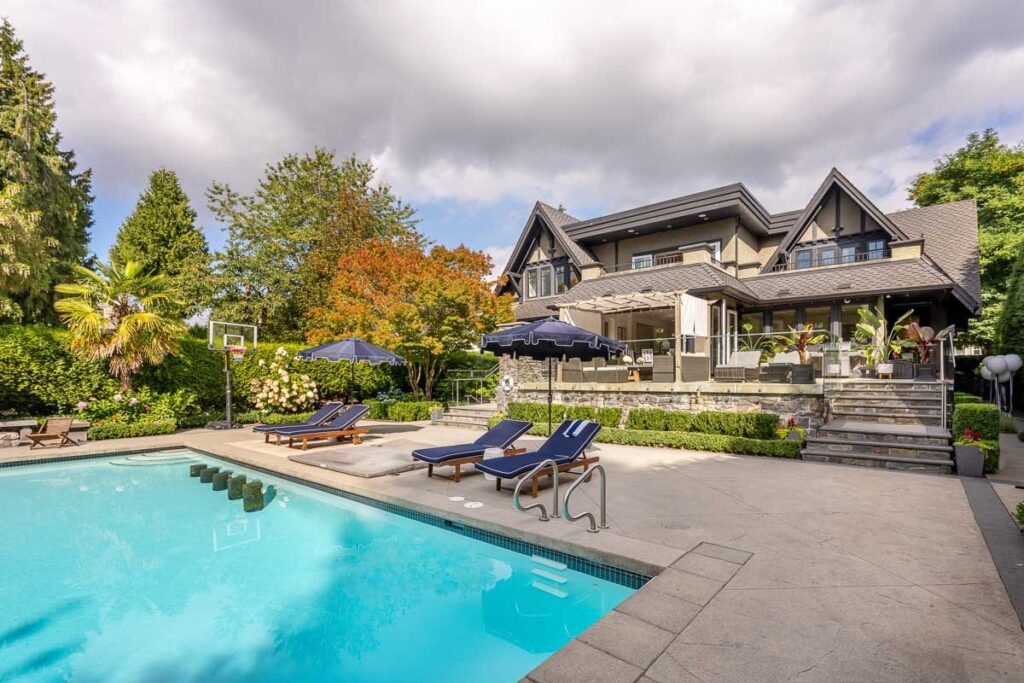
Wind Checklist: Comfort Outside, Comfort Inside, Durability
Wind is the quiet factor that can make a beautiful lot feel uncomfortable. It affects patios, entries, and even how you use outdoor living spaces across the year. In the Lower Mainland, wind exposure can vary a lot based on elevation, proximity to open corridors, and how buildings channel airflow.
This checklist helps you identify exposed zones and sheltered zones so your home feels calm and usable, not drafty and exposed.
What Wind Affects On A Custom Home Lot
Wind can change the comfort of your front door experience and your outdoor spaces. A windy entry makes winter days feel harsher, and it can affect how doors operate and how much shelter you want at the threshold.
Outdoor living suffers when wind is ignored. A patio that sits in a wind corridor may look perfect on plan, then sit empty most of the year. If you plan to invest in outdoor kitchens, fire features, or covered seating, wind becomes a design priority, not a detail.
Wind can also influence durability decisions in exposed areas. Your builder and designer can guide material choices, but it helps if you document where exposure is strongest.
Microclimates To Watch For In Greater Vancouver
Some lots are naturally more exposed. Ridges, hilltops, and open corners catch wind more strongly, while valleys and gaps between buildings can funnel wind in a way that feels unpredictable.
If your lot sits near a corridor that opens toward water or wide open space, pay attention to how gusts move. In denser neighbourhoods, wind can also tumble around building edges and create uncomfortable corners.
You can’t map wind perfectly in one visit, but you can spot patterns: “This corner is always breezy,” or “This side feels sheltered.”
Quick Wind Checks You Can Do
If possible, visit at two different times of day. Even without data, you’ll notice whether the site has a consistent breeze or occasional gusts. Look for signs like wind-shaped vegetation, consistently dry corners, or sheltered zones where leaves and debris collect.
Stand where you imagine your main patio, then stand where you imagine your entry. Ask yourself whether you would enjoy using those spaces on a typical spring or fall day. If the answer is no, write it down now. It’s much easier to rotate a patio or add a wind break on paper than to “fix” it after the build.
A quick sketch with arrows and “exposed” or “sheltered” labels is enough to guide early design decisions.
Turn Your Site Notes Into Design Decisions The So What Step
A checklist is only useful if it turns into decisions your team can act on. This step is where you convert photos and observations into a one-page summary that informs layout, glazing, and outdoor living.
When you do this well, design meetings get simpler. You spend less time debating preferences and more time aligning choices with evidence from the lot.
Create A One-Page Site Summary
Your one-pager should be easy to scan. Include your labelled 4-direction photo set, a simple sketch of the lot, and a few short notes under each topic: sun, slope, views, wind.
Then add a short “top three priorities” list. For example:
- Protect the mountain view from the main living space
- Capture morning light in kitchen and dining
- Keep patio sheltered from prevailing gusts
This clarity helps your designer propose solutions that match what you value most.
Use Trade-Offs Instead Of Wish Lists
Trade-offs are where good custom homes happen. A wish list says, “We want everything.” A trade-off says, “We want the best version of what matters.”
Examples you can decide early:
- Views vs. glare control in the evening
- Big glass vs. privacy from neighbours
- Walk-out level vs. excavation complexity on a sloped lot
- Sunny patio vs. sheltered patio, depending on wind exposure
When you name trade-offs clearly, your team can design with confidence and explain why choices were made.
Feed It Into Your Design Brief
Once you have your one-page site summary, plug it into your design brief. Your brief becomes more grounded, and your project runs more smoothly because the design direction reflects real site conditions.
If you want a simple framework for turning observations into clear requirements, our guide on how to write a clear design brief for your custom home can help.
Common Site Analysis Mistakes We See And How To Avoid Them
Most site analysis mistakes come from rushing the process or relying on impressions instead of documentation. The fixes are simple, but they only work if you slow down enough to take consistent photos and write down what you observe.
Use this section as a quick check before you finalize your notes. If you catch even one of these issues early, you can save yourself redesign time later.
The One Sunny Visit Problem
A single sunny visit can make a lot feel brighter than it is most of the year. In the Lower Mainland, light conditions change quickly, and winter sun angles can make a big difference in how your main rooms feel.
The fix is simple: label your photos with time of day, and if you can, visit at two times or on different days. Even a short second visit can confirm whether your first impression holds.
Ignoring Drainage Until Excavation Starts
Drainage issues often show up when you disturb the site. If you ignore where water moves now, you may end up reacting later with added scope and delay.
Walk the lot like water would. Note low points and likely flow paths. If possible, observe the site after rain, and record what you see. Your builder can then plan grading and drainage with fewer surprises.
Assuming The Best View Equals The Best Layout
A view is valuable, but daily life matters more. If you place a rarely used room in the best view position and push the main living space into a darker or noisier area, you may regret it.
Instead, define which rooms deserve the best view and why. Document view moments that matter daily, then design around them.
Forgetting Wind On Patios And Entries
Wind is easy to ignore on a calm day. Then, once the home is built, you may find the patio feels exposed and the entry feels harsh in winter.
Stand in your proposed patio and entry locations and note comfort. Mark sheltered and exposed zones on your sketch. Small layout shifts early can make outdoor living far more usable.
Not Documenting Anything So Decisions Get Re-Litigated Later
When you don’t document, you end up re-living the same conversation every time a decision comes up. People remember different things, and the design direction can drift.
The fix is to treat your photos and one-page summary as the shared source of truth. If a decision gets questioned later, you can point back to your site evidence and move forward.
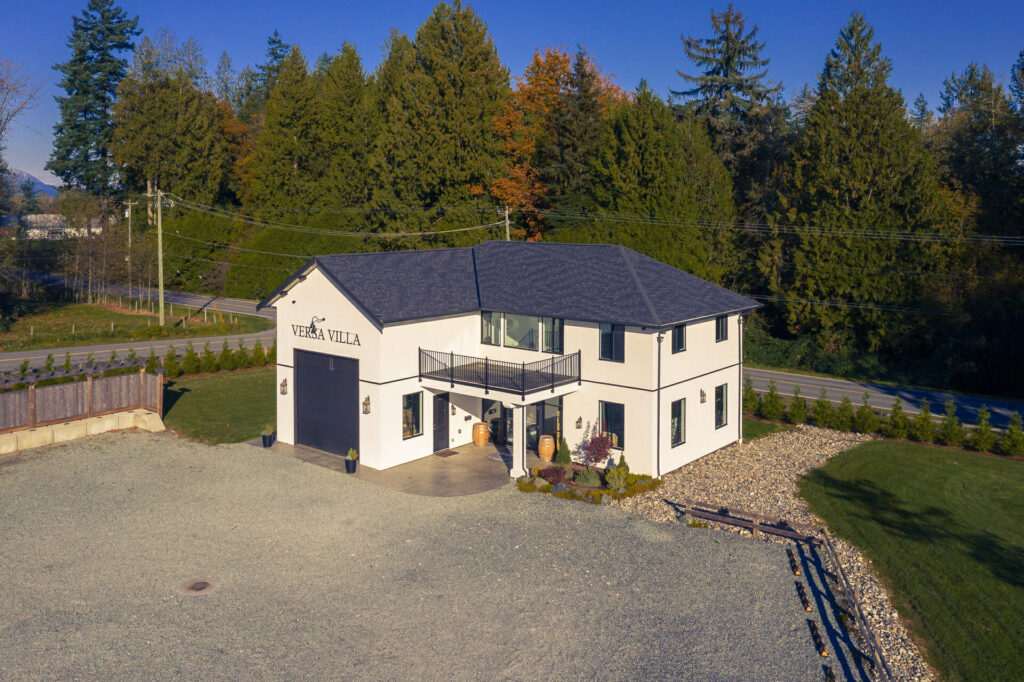
How Versa Homes Uses Site Analysis To De-Risk Design
Versa Homes takes care of your site analysis which does more than create good drawings. It de-risks your build by aligning the design with real conditions on day one. When we translate site realities into a buildable plan, you get fewer redesign cycles, clearer decisions, and a smoother path from design to construction. Our process supports that with fixed-price contracts, a detailed build schedule with pre-booked trades, and a client portal that keeps you informed with daily logs and progress photos. If you want help turning this checklist into a confident plan, start with our architectural design services for custom homes.
Frequently Asked Questions
What Is A Site Analysis For A Custom Home?
A site analysis is a clear record of your lot conditions, including daylight patterns, slope and drainage clues, key views, and wind exposure. It helps your design fit the lot instead of fighting it.
Can I Do A Site Analysis Myself Or Do I Need A Professional?
You can do a first-pass checklist yourself using photos and notes. You typically need professionals for items like a topographic survey, geotechnical conditions, detailed grading, and any engineered foundation decisions. For white-glove service, choose a builder like Versa Homes that takes care of everything for you form A to Z.
How Do I Check Sun Exposure On My Lot In Winter Versus Summer?
Use a compass to confirm direction, then take consistent photos at different times of day. Lower winter sun angles create longer shadows, so note where shade lands and where glare shows up.
What Slope Is Too Steep To Build On?
There is no universal number. “Too steep” depends on the soil, drainage, access, and the type of home you want to build. If the lot is steep or shows signs of erosion or retaining issues, flag it early for survey and geotechnical input.
How Can I Tell If My Views Might Change In The Future?
Document what creates the view today and what it depends on, like trees or neighbouring lots. Then ask early questions about local policies and context so your design doesn’t rely on something unpredictable.
How Do I Design Outdoor Spaces That Stay Comfortable In Wind?
Use your site notes to place patios and entries in sheltered zones. Add wind breaks through layout, landscaping, and built elements. Avoid putting your main outdoor living area in a known wind corridor.
What Should I Bring To My Architect Or Builder From This Checklist?
Bring a labelled 4-direction photo set, a simple sketch showing sun, slope, and wind, plus a short list of priorities. Clear documentation helps your team make better decisions faster.


Felipe Freig
Founder of Versa Homes
Felipe Freig is the founder of Versa Homes, a Vancouver custom home builder known for architecturally driven, fixed-price projects. With years of hands-on site experience and deep permitting and by-law knowledge, Felipe leads high-performance teams that deliver precision craftsmanship, clear budgets, and on-schedule luxury homes.
You May Also Like...

10 Red Flags You Hired the Wrong Custom Home Builder

Planning Mechanical Systems For Luxury Estate Homes

Navigating Custom Home Financing: Land Purchase, Construction, and Mortgages
Essential Considerations for Designing Homes in Rainy Climates
Starting with a Builder is Key to Staying Within Budget When Building
Fall Maintenance Guide: Raking Leaves and Lawn Aeration Tips

BC Energy Step Code: A Practical Guide for Custom Homes

The Best Luxury Roofing Options for B.C.: What to Choose for Coast, Mountains, and Everything Between
